Live Bots
Deploy a Bot
Once you have created, trained, and tested your chatbot, you can then deploy it across various channels such as Telegram, WhatsApp, Facebook, or your website. Use the following steps to deploy your chatbot.
Before you begin, ensure you have selected the chatbot you wish to deploy. You can do this via the dropdown menu on the top-right corner of your screen.
- From Bua, navigate to Live Bots > Deployments.
- From the Deploy Dashboard, navigate to the
Deploy A Bottab. - A pop-up window, illustrated in the image that follows, appears, prompting you to select the and model you wish to deploy.
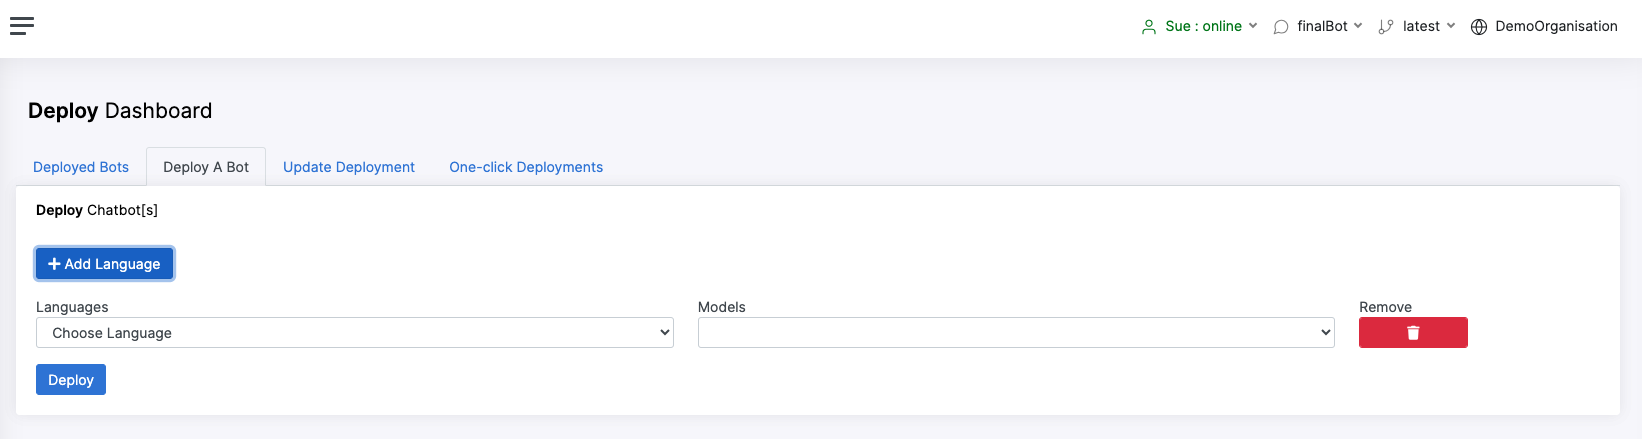
- Enter the required information and click
Deploy. You are notified by email once the deployment has been successful. - The successfully deployed bot is now listed on the Deployed Bots tab.
Use the actions dashboard to control who interacts with your chatbot and what features they can access. This allows for a targeted deployment. You can limit the bot to a select group of users, essentially creating a testing pool. This way, you can refine new features with a smaller audience before rolling them out to everyone. See the Custom Actions section of this documentation for more information.
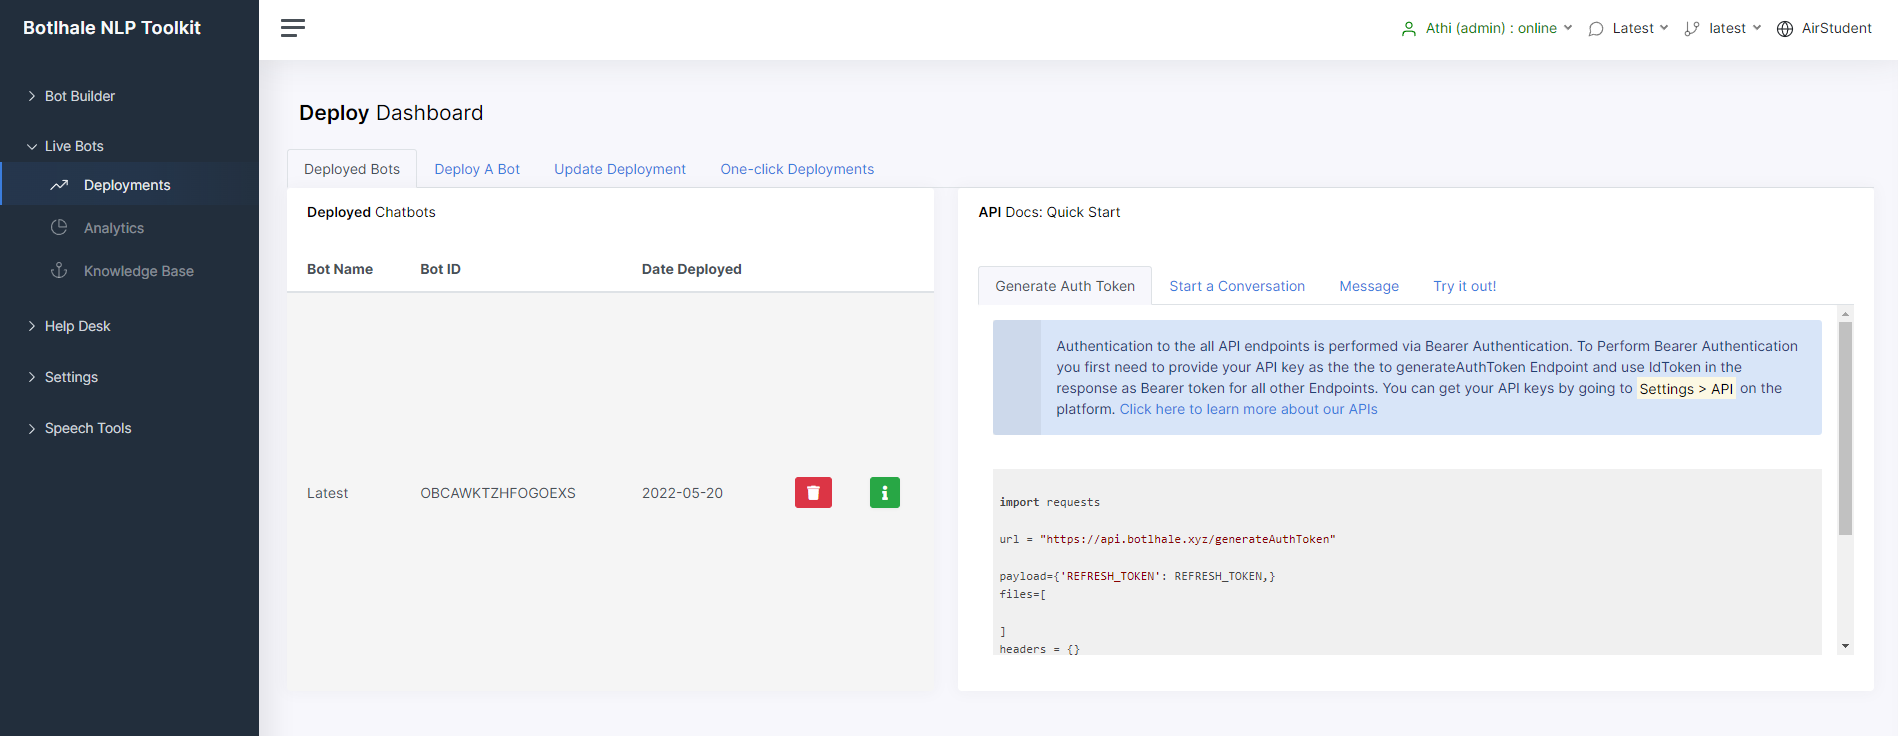
Once you have deployed one or more chatbots, you can manage and test them from the Deployed Bots tab. This tab provides essential information about your deployed bots, including their BotID and Date Deployed.
For convenient API interaction and testing, the Deployed Bots tab features an "API Docs: Quick Start" window on the right. This window includes the following tabs:
- Example Requests: Provides sample requests to the API, allowing you to directly interact with your deployed bot.
- Try it out: Enables you to send test requests, verifying your bot's functionality.
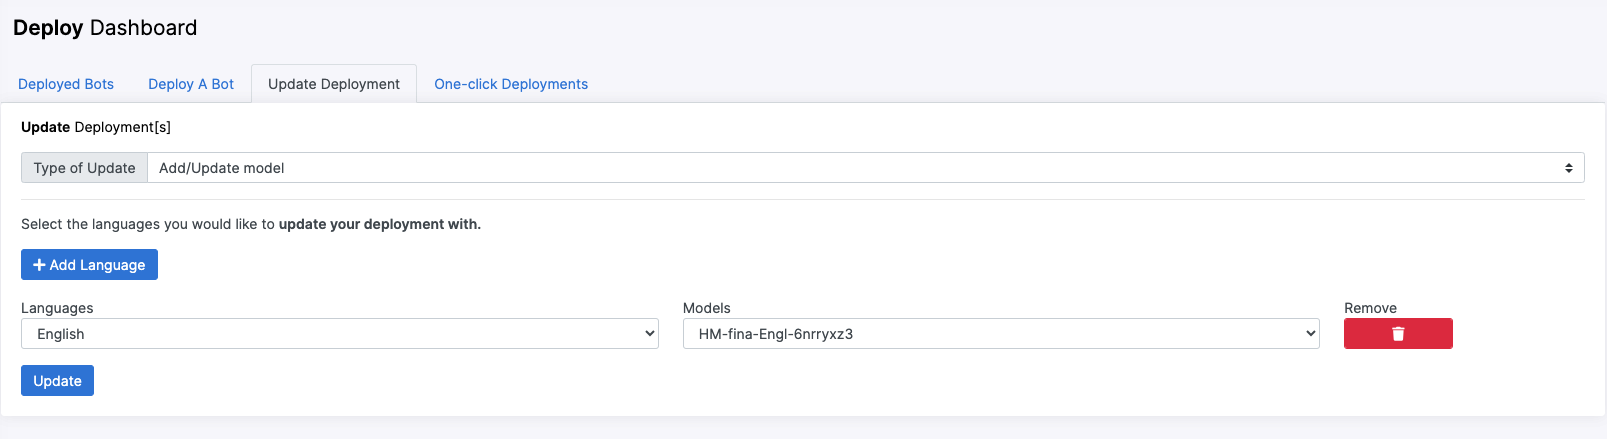
The Update Deployment tab allows you to add or remove one or more languages associated with your deployed chatbot.
To add a language, simply click the Add Language button and select the language and model you wish to add. To remove a
language, simply use the corresponding Remove icon. The following screenshot gives you a view of this tab.
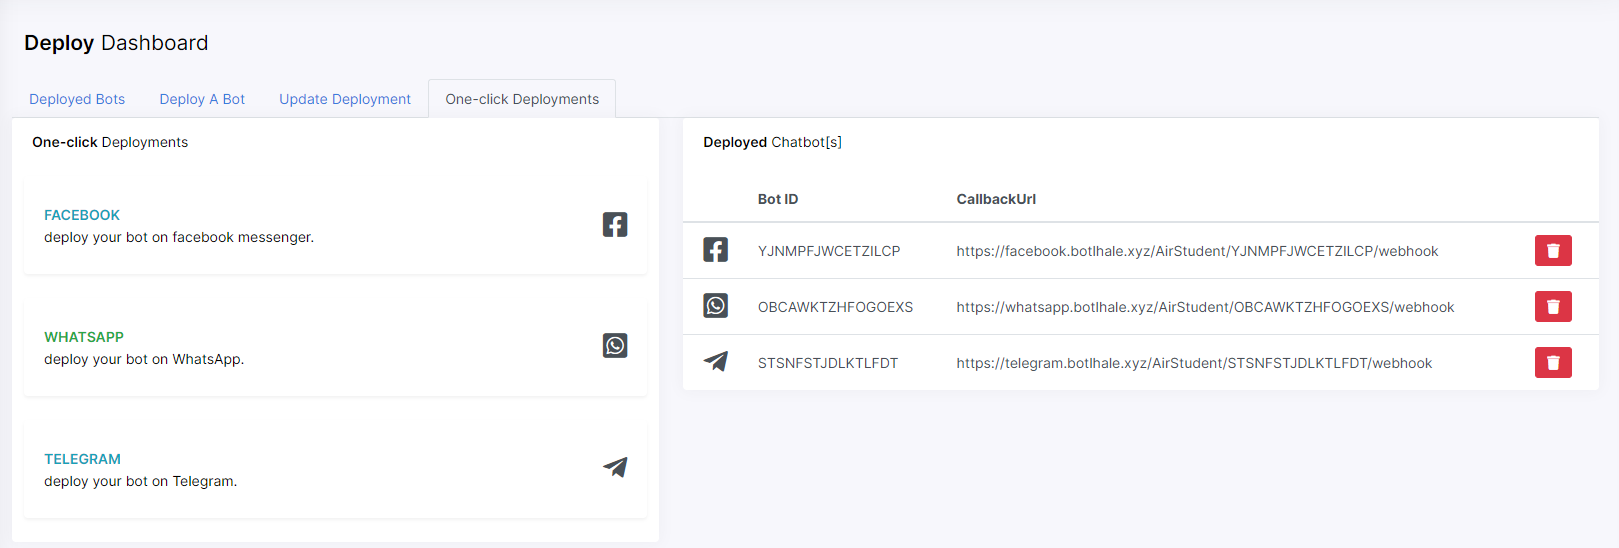
The One-click Deployments tab allows you to get your chatbot live on the platform of your choice with just one click. With this tab,
your chatbot can be deployed to either Facebook, WhatsApp, or Telegram. To deploy your chatbot to one or more of these platforms,
click on the logo icon that corresponds to the platform to which you wish to deploy your chatbot. The following image gives you a view
of this tab.
When attempting to launch your chatbot on the platforms listed above, you are prompted for an authentication token or key. This information is made available to you during the onboarding process.
Review Analytics
Botlhale AI makes available to you analytics on your deployed chatbots. This information can be accessed on Bua’s Analytics page by navigating to Live Bots > Analytics. From here, you can view various performance metrics for your chatbot such as the completion rate, fallback rate, handoff rate, bot confidence, and much more.
To view your reports, ensure you have selected the deployed chatbot whose performance you wish to see. You can do this via the dropdown menu on the top-right corner of your screen.
The following image gives you a look at the analytics dashboard.
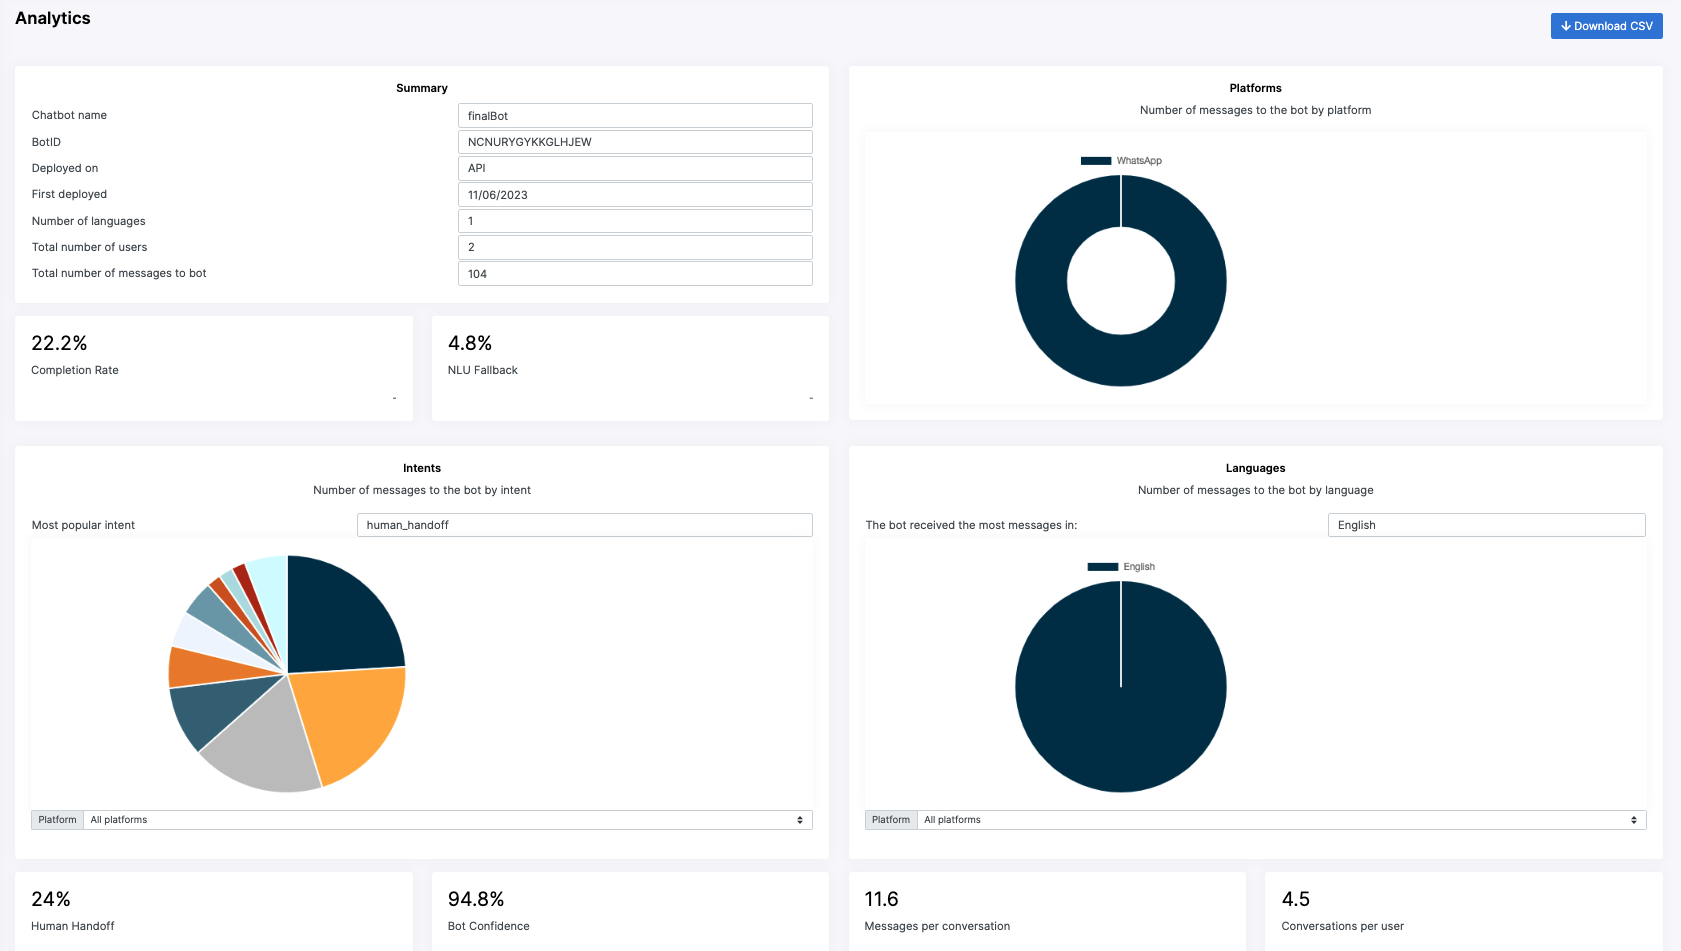
The Analytics page also gives you the option to download the full report as a CSV file. To do this, click the Download CSV
button on the top-right corner of the page.
Update Knowledge Base
Bua contains a Knowledge Base page from which you can continually train and improve your chatbot once it's been deployed. The following screenshot gives you a view of the Knowledge Base page.
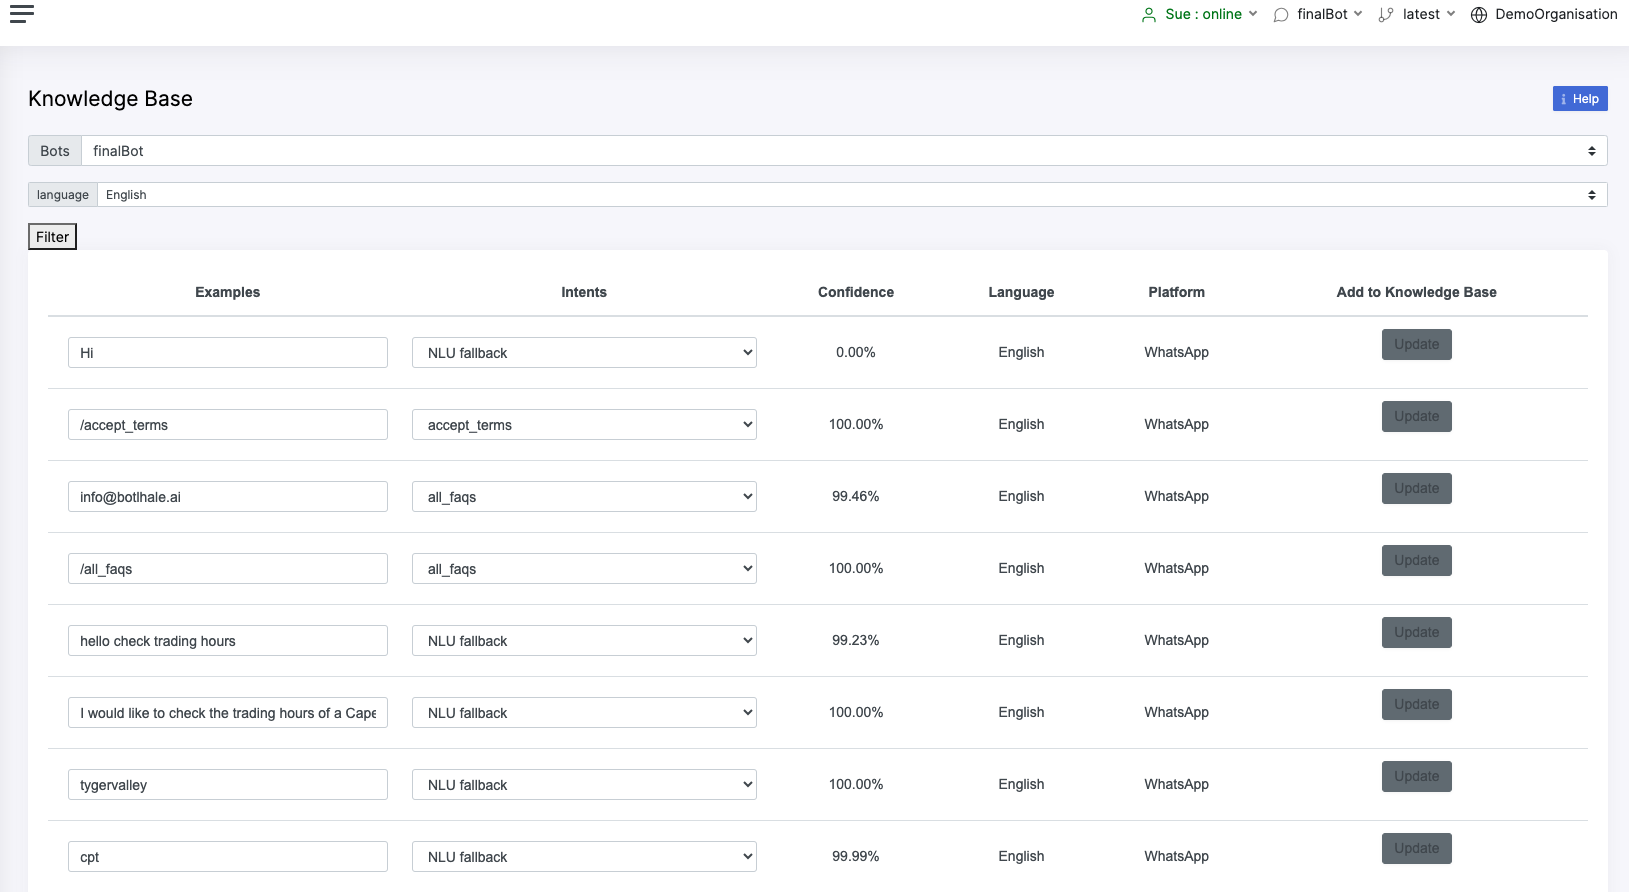
In the view from the previous screenshot, the chatbot in question has been deployed and end users have begun to interact with it. The Knowledge Base gives you a view of all the unique messages sent to your bot and the intent each of these messages were classified as.
On the Knowledge Base page, you have the option of reclassifying one or more messages to a different intent. Use the following steps to perform this action.
- From the Knowledge Base page, ensure the appropriate chatbot and language are selected. Use the arrows to toggle between chatbots and languages.
- Navigate to the Intents column of a specific row to reclassify a message to a different intent. Use the dropdown menu to toggle between intents.
- Click Update. You have successfully reclassified a message in the Knowledge Base. Repeat these steps for as many messages as needed.
Contact us
We are here to help! Please contact us with any questions.